Managing Team Members
Adding Team Members
- To add a team member to a partner organization, select Team Members from the Navigation Menu.
- Click Add New!.
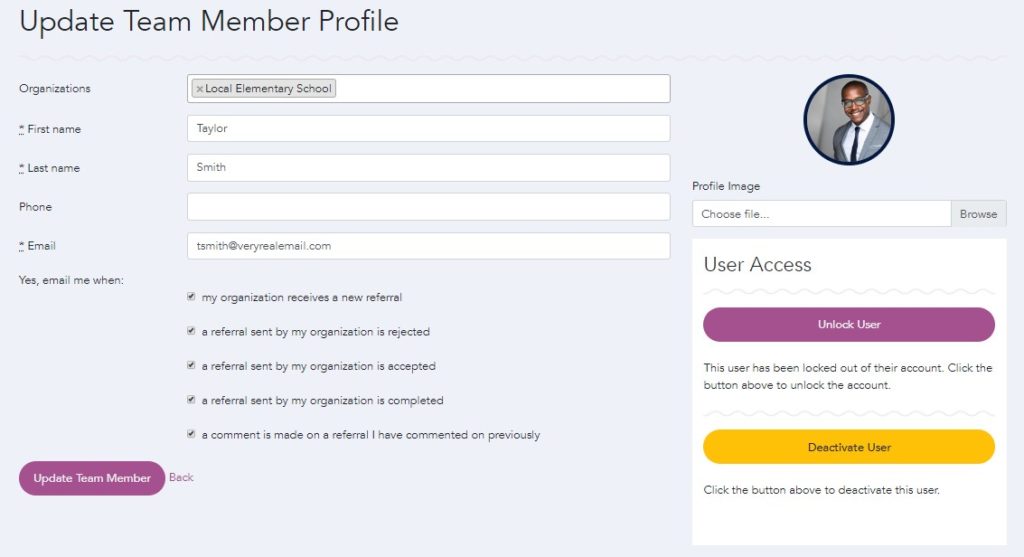
- Complete the new team member information fields.
- NOTE: You may provide a team member with access to more than one organization by making multiple selections from the Organizations dropdown menu.
- New team members will be opted-in to receive all email notifications. To opt-out of email notifications, uncheck the box(es) for the instances in which the user shouldn't receive notifications.
- NOTE: Team members can edit their notification preferences through My Profile.
- To finalize the new team member, click Update Team Member.
Providing Existing User with Access to New Organization
- To provide an existing team member with access to an additional organization, select Team Members from the Navigation Menu.
- Select the team member you would like to add from the list of names. You may also search for the team member by name or email using the Search Team Members feature.
- On the Update Team Member Profile page, click on the Organizations dropdown menu and select the organization(s) to which the user requires access.
- Click Update Team Member.
Removing Team Member Organization Access
- To remove a team member's access for an organization, select Team Members from the Navigation Menu.
- Select the team member you would like to remove from the list of names. You may also search for the team member by name or email using the Search Team Members feature.
- On the Update Team Member Profile page, click the x next to the organization to remove access.

- Click Update Team Member.
Approving or Denying a Requested Team Member
IRIS team members may request access for new team members through the Team Member screen. System Managers have the ability to deny or approve new user access to IRIS. New User Requests should come from an organization's Primary Contact. If the request has been submitted by a team member, the System Manager should verify the request with the Primary Contact to ensure data security. The Primary Contact's information can be found on the Organization Details Page.
- To view pending requests for IRIS access, select Team Members from the Navigation Menu.
- If there is a pending request, a message will appear below the Add New! button.
- Click pending request.
- Select the name of the requested IRIS user you would like to review.
- Review the information including comments from the user making the request.
- To accept the request, click Approve. To reject the request, click Deny.
User Access Panel
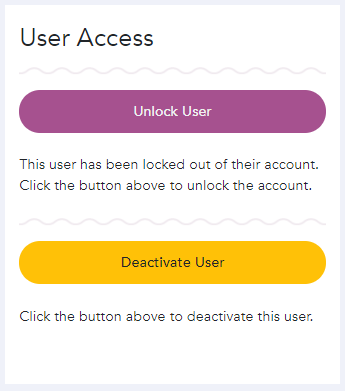
The User Access Panel is located on the right-hand side of the Update Team Member Profile. This is where you will manage the four different states that a user's account will be in.
- Active: The user can log in and access their account with their email and password.
- Inactive: The user cannot access their account.
- They will receive the following error when attempting to log in: "Your account is not activated yet."
- One of the following descriptions will appear below the Activate User button providing an explanation as to why the user is inactive.
- "Deactivated on {date} because they have not logged in for at least 120 days."
- "Deactivated on {date} because John Smith Community Manager edited this profile and deactivated it."
- "Deactivated on {date} because the Organization this user belonged to was deactivated."
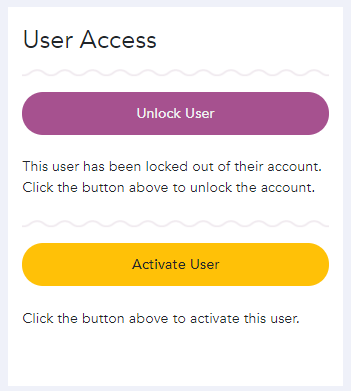
- Active & Locked: An active user has entered the wrong password five times in a row and locked their account.
- They will receive the following error when attempting to log in: Your account is locked. Please email IRIS Support at irisadmin@ku.edu to unlock your account.
- Inactive & Locked: An inactive user has entered the wrong password five times in a row and locked their account.
- They will receive the following error when attempting to log in: Your account is locked. Please email IRIS Support at irisadmin@ku.edu to unlock your account.
Deactivating Team Members
- To deactivate a team member, select Team Members from the Navigation Menu.
- Select the team member you would like to deactivate from the list of names. You may also search for the team member by name or email using the Search Team Members feature.
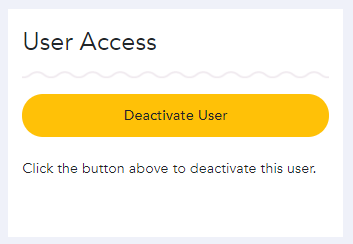
- Navigate to the User Access Panel.
- Click the yellow Deactivate User button.
Activating Team Members
A team member will go inactive for one of the following reasons:
- "Deactivated on {date} because they have not logged in for at least 120 days."
- "Deactivated on {date} because John Smith System Manager edited this profile and deactivated it."
- "Deactivated on {date} because the Organization this user belonged to was deactivated."
Reactivation of users who have been intentionally deactivated should be verified with the organization's Primary Contact to ensure data security. The Primary Contact's information can be found on the Organization Details Page.
- To activate a team member, select Team Members from the Navigation Menu.
- Select the team member you would like to activate from the list of names. You may also search for the team member by name or email using the Search Team Members feature.
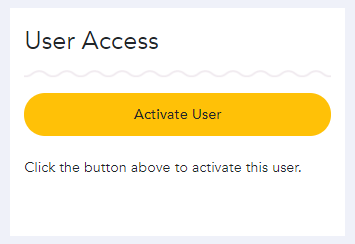
- Navigate to the User Access Panel.
- Click the yellow Activate User button.
Unlocking Active Team Members
- To unlock an active team member, select Team Members from the Navigation Menu.
- Select the team member you would like to unlock from the list of names. You may also search for the team member by name or email using the Search Team Members feature.
- Navigate to the User Access Panel.
- Click the purple Unlock User button.
Unlocking Inactive Team Members
- To unlock an inactive team member, select Team Members from the Navigation Menu.
- Select the team member you would like to unlock from the list of names. You may also search for the team member by name or email using the Search Team Members feature.
- Navigate to the User Access Panel.
- Click the purple Unlock User button.
- Follow the instructions in the Activate Team Members section above to activate the team member.
